


By: Arif Khan
In last session we have successfully created our first robot framework script with all four (4) basic key sections in the robot script. Now we are going to write some code and try to execute the same code and see the results. Let’s dive into the topic and create our first basic script, the purpose of writing this script is just to give you the brief introduction, how you will write and execute the script and how you will be able to analyze the results after the execution.
Our goals in this tutorial
- Launch the browser via robot framework
- Open the URL via robot framework
- Close the browser via robot framework
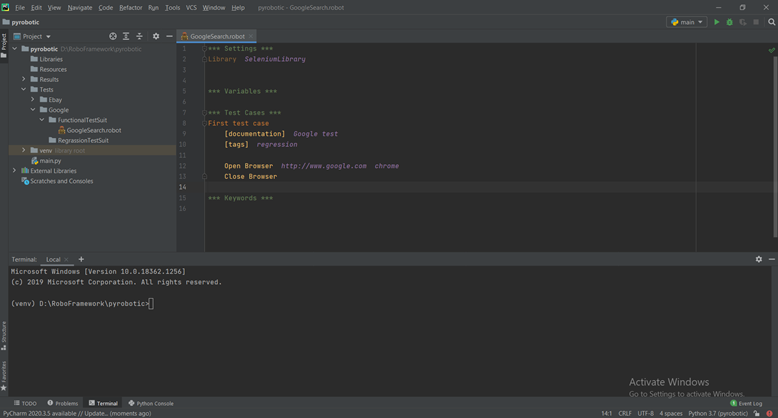
We left our last session at the stage which you can see in below screen shot.

Now we are going to fill this empty script file with some basic code.
Writing the code in robot framework Key sections
In *** Settings *** Key Section
Library SeleniumLibrary # Remember to put two spaces in between Library and SeleniumLibrary. As robot framework accepts two spaces
In *** Variables *** Key Section
Presently we leave this section as is, we will use this section in coming-up sessions.
Now we are going to write our test script in *** Text Cases *** section. In this section we will use some Selenium browser control Keywords to understand the available Selenium Library Keywords you can visit the KeywordsLibrary you can find all available Keywords under Shortcuts in the linked page. You can check all details about any Keyword by clicking on it.

In *** Test Cases *** Key Section
This is just a sample test case (Don’t forget to add two 2 spaces in between commands)
*** Test Cases ***
    [documentation]  Google Test
    [tags]  regression
    Open Browser  http://www.google.com  chrome
# This Keyword will open the browser and activate the defined url in front of it you also have define the name of browser which you are going to open. That is why I put browser name in front of url.
    Close Browser  # This Keyword will close the opened browser.
Our sample script is ready to execute now. To execute this script at Pycharm terminal just write following command. Robot –d <name of results folder> <complete path of robot file which we are going to execute> then hit enter.
robot –d results Tests/Google/FunctionalTestSuit/GoogleSearch.robotAfter successful execution
After the successful execution you will see the result in your terminal as seen in below screen shot.
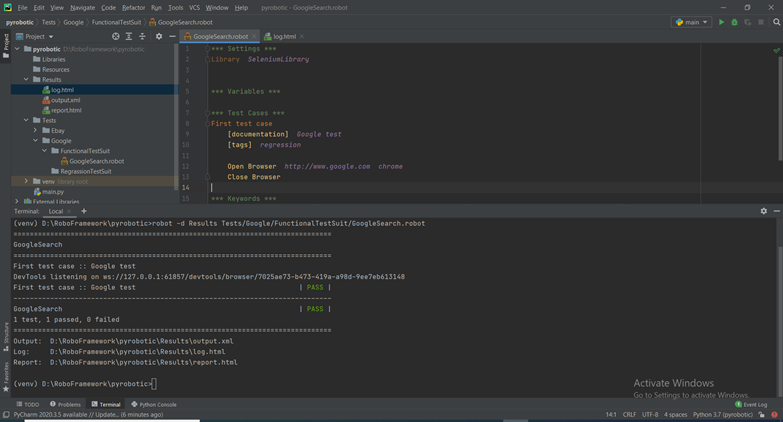
Also you will find three 3 files in Results folder
- log.html
- output.xml
- report.html
open them and check the results. It will contain the all information about test case the document is self-explanatory. Logging functionality is provided by the robotframework by default you are not required to do any extra configuration.
Log.html screen shot

Output.xml file
You can view this file by double clicking on it in Pycharm editor/xml editor or in browser.
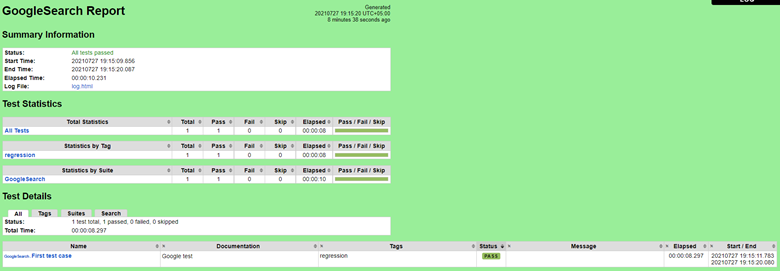
Report.html screen shot
I hope you understand what I tried to explain you in this blog.
You are always welcome to comment or ask any question in below comment section. Thank you.