


By: Arif Khan
Actually she is pretty and fast but unfortunately not a girl. It is a new general purpose high performance programming language, the beauty of this language is, it looks like Python feels like Lisp and runs like C and Fortran. It is easy to use powerful and faster than python all at once. Thank you for joining my blog. Read full document to get more information.
Jeff Bezanson, Stefan Karpinski, Viral B. Shah, and Alan Edelman, started work on Julia in 2009. The aim of the team was to build a open source language which was high-level and fast. Team published a website blog about their mission of building the language on 14 February 2012. In response of a question raised by interviewer, about the name of the language “Julia” Karpinski said, that there is no explainable reason behind but, it’s a pretty name, in April 2012. This name is suggested by a good friend of mine Bezanson replied. Actually Julia stands for “Jeff’s uncommon LISP is automated”, they wrote latter on. Check out Wikipedia if you want to know more about the history of Julia. Now let us talk about the Julia installation process on Windows first, you can download its media from Julia.org at the top you will see the download button, this button will take to download page according to your environment download latest available version’s installer file.
Julia Installation
Julia installation is pretty straight forward, in windows environment just click at the installer and it will guide you for rest of the setup, and there is no big difference in its installation based on environment just little environmental difference is there. In my next blog you will be able to see its Ubuntu installation.
Let’s begin.
Double click the the installation file, as I said above it will guide you through the rest of the setup, as seen below.
Step-1.
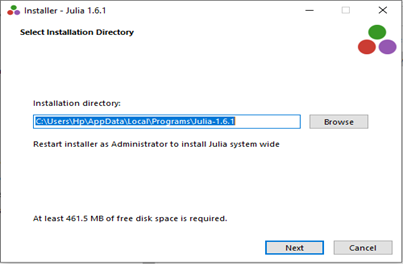
Step-2.
Don’t forget to check the red circled box, otherwise you have to add its path in environment variables manually.
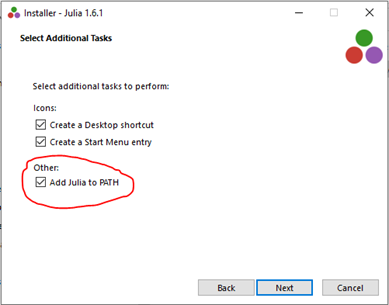
Step-3.
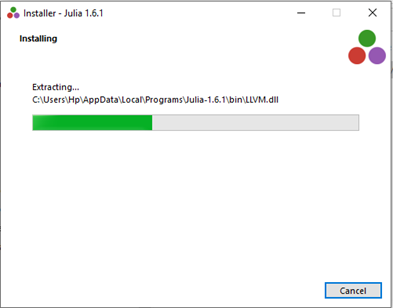
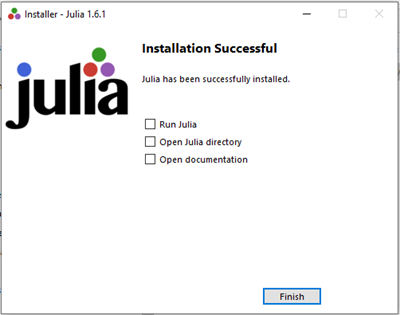
Step-4.
It is a final step. Congratulations you have successfully installed Julia in your PC.
As you have downloaded and installed Julia. Let’s take a surface look in its environment. Press window button left bottom of the screen, most probably you will find Julia at the top double click it, you will see below screen with Julia banner and the green colored Julia prompt at the very left base line of the screen, it is Julia’s interactive mode.
To seek help type ? at Julia prompt, if you want to switch it in package mode then write ] at Julia prompt we will talk about this in next short post.

REPL (Read Eval Print Loop) Mode
In REPL mode you can perform any operation. Later on we will discuss about them in detail. At this time, I just want to show you the environment.
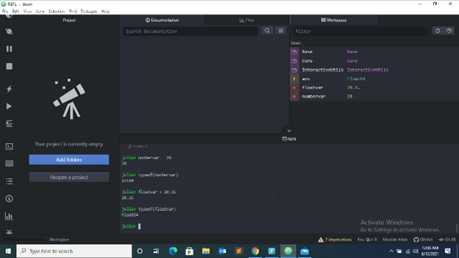
There are many IDE’s available to work with Julia like Uber-Juno and Jupyter Notebook there are some more. In this i will show you how to install atom and within the atom packages installation process of Uber-Juno. You will find the installation process of Notebook and adding Julia in Jupyter Notebook, I personally like the Notebook environment most.
In below screen shots you can see the installation process of Uber-Juno and some basic mathematical and string operations.
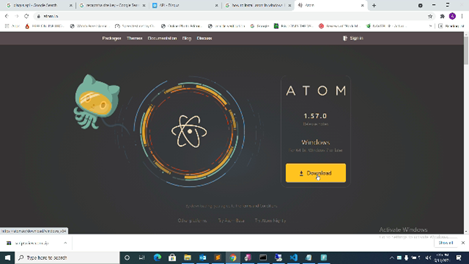
Download the Atom from www.atom.io
Watch installation video by visiting Video Tutorials https://scriptsview.com/videos/atom-2/
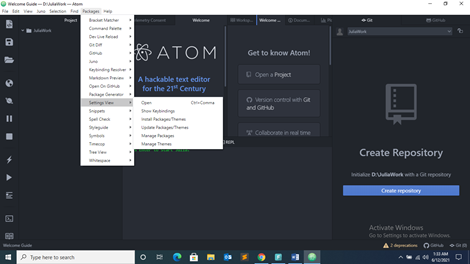
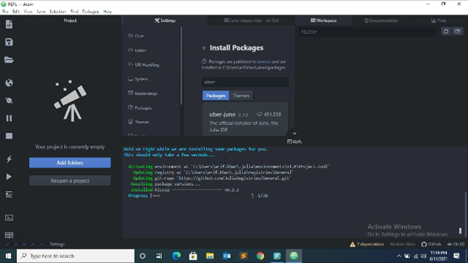
After successful installation, start atom and select the package installation as below screen shot. Or use CTRL+Comma to go into package installation option.
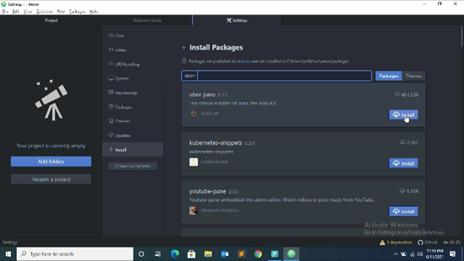
Choose install option from menu and in the package search text box type uber-juno and click install button as seen in below screen shot.
Installation will start, it will take few minutes depending on speed of your internet.
It will looks like as.
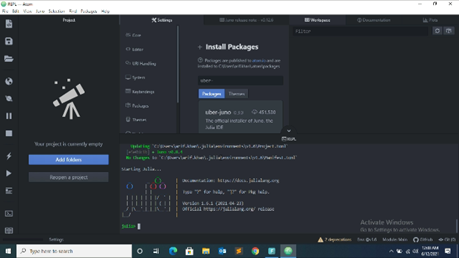
Now working in atom environment.
Hearing from you, will be my pleasure, If you have any comments or questions, please post below.